Recommended Products
biological source
bovine
Quality Level
sterility
irradiated
sterile
diam.
21 mm , 5135-5EA
4 mm , 5135-25EA
thickness
1.5 mm , 5135-5EA
pore size
200 μm average pore size
General description
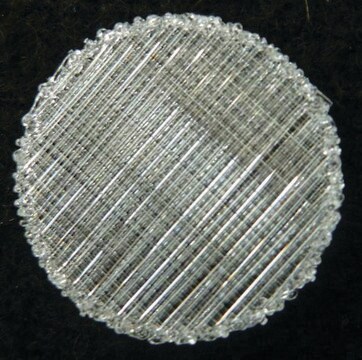
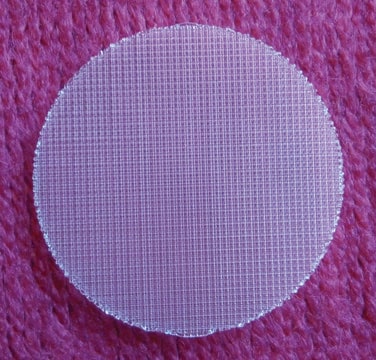
SpongeCol® is a collagen sponge with an interpenetrating, columnar porous architecture structure. SpongeCol® contains a unique columnar porous network which permits cells and nutrients to flow completely through the interpenetrating pores and provides an increased surface area for cell attachment, growth and migration. It is composed of highly purified Type I collagen which best supports the attachment, proliferation, and function of cells. The collagen is lightly cross-linked for increased mechanical strength and durability for short and long term tissue culture yet is still biodegradable over the longer-term. The diameter of the pores ranges from 100 to 400 micron with the average diameter being approximately 200 microns. This product is terminally sterilized and ready-to-use.
Other Notes
5135-25EA is 4 mm in diameter and 1.5 mm thick and will fit into a 96-well culture plate well. Each package contains 25 collagen sponge discs.
5135-5EA is 21 mm in diameter and 1.5 mm thick and fit into a 12 well culture plate or sanitary luer connectors for flow perfusion. Each package contains 5 collagen sponge discs.
Directions for Use
Preparation and Cell Seeding
Note: Cell attachment to the sponge is generally the most critical step in tissue culture. Temperature, pH, gas exchange and cell concentration can affect the rate and efficiency of attachment. Optimum seeding rate depends on the type of cell being cultured.
1. Aseptically remove the sponge discs from the packaging in a laminar flow work station.
2. Carefully place the sponges into the wells of a 12-well tissue culture plate using a sterile instrument. Be careful not to damage the sponge as it is being transferred. It is recommended to use non-treated tissue culture plasticware.
Note: Tissue-coated plasticware may need to be coated with agarose to prevent cell attachment to the plastic instead of the sponge.
3. Suspend cells at desired concentration (1x10⁴ – 1x10⁵ cells/mL) and dispense sufficient volume of cell solution on top of the sponge placed in the well.
Note: An alternative method is to suspend cells in a neutralized collagen solution (such as PureCol™ type I collagen Catalog #5006 or PureCol™ EZ Gel Catalog #5074). Dispense collagen/cell solution on top of the sponge placed in the well.
4. Transfer to a 37°C incubator for about 1-2 hours to allow for initial cell attachment.
Note: If using the collagen suspension method, the collagen will polymerize at 37°C and encapsulate your cells within the collagen matrix and the sponge.
5. After 1-2 hour, remove the plate from the incubator and check for cell attachment. Additional testing may be required to optimize the time it takes for the cells to attach to the sponge. Check the morphology of the cells. Cell adherence and spreading will dictate the time for attachment.
6. Once the cells have adequately attached to the sponge, increase the final volume in each well to fully cover and provide adequate medium for the culture system.
Changing the Media
1. Change the media 12-24 hours after the initial seeding. The frequency of changes will be determined by cell type, cell attachment efficiency, pH (maintain at pH 7.0 to 7.4) utilization of medium nutrients available to cultures. More frequent medium changes may be required compared to 2D culture systems.
Harvesting of Cells
Note: Protease digestion is the standard method of releasing cells from the sponges. The strength of the attachment of the cells to the collagen sponges will vary from cell line to cell line. The enzyme concentration and digestion time will vary depending upon the activity of the enzyme and the confluence of the cells. Collagenase and/or trypsin may be the preferred method.
1. Washing the sponge with EDTA-PBS may assist the protease digestion. Add sufficient volume to cover the sponge.
2. Aspirate the EDTA-PBS solution from the well.
3. Add sufficient dissociation solution to the well to fully over the sponge.
4. Transfer to a 37°C incubator. Check for cell detachment periodically for cell detachment.
5. Once the cells have fully detached, remove the cells and dispense in a centrifuge tube.
6. Centrifuge the cells as require.
Legal Information
PureCol is a trademark of Advanced BioMatrix, Inc.
SpongeCol is a registered trademark of Advanced BioMatrix, Inc.
Storage Class
11 - Combustible Solids
wgk_germany
WGK 1
flash_point_f
Not applicable
flash_point_c
Not applicable
Choose from one of the most recent versions:
Certificates of Analysis (COA)
Lot/Batch Number
Don't see the Right Version?
If you require a particular version, you can look up a specific certificate by the Lot or Batch number.
Already Own This Product?
Find documentation for the products that you have recently purchased in the Document Library.
Customers Also Viewed
Zhiyong Du et al.
Journal of cellular and molecular medicine, 25(2), 701-715 (2020-12-21)
Hepatic fibrosis (HF) is involved in aggravated wound-healing response as chronic liver injury. Extracellular vesicles (EVs) carrying microRNA (miR) have been reported as therapeutic targets for liver diseases. In this study, we set out to explore whether adipose-derived mesenchymal stem
Our team of scientists has experience in all areas of research including Life Science, Material Science, Chemical Synthesis, Chromatography, Analytical and many others.
Contact Technical Service

